Great news – now you can install Linux on Windows desktop or laptop. Isn’t it exciting news? Thanks to Microsoft! If you are using Windows 10 and would like to have Linux installed,, then the following steps may help. I assume you know about Linux. If not, then check out this beginner video. As you may know, Linux got multiple distros, and one of the popular among is Ubuntu.
We will be discussing how to get that installed.
What is Hyper-V?
Microsoft’s Hyper-V is not new. It got first released in 2016. At the time of release, it is thought to be a big competitor to other virtualization technologies, including Oracle’s VM VirtualBox or VMWare’s Fusion. Hyper-V is a virtualization solution that lets you do virtualization from Windows. Just like other virtualization solutions, it also can virtualize not only hardware but also the entire operating systems. That’s why it makes it an ideal choice for Linux virtualization on Windows. It comes in three versions.
Hyper-V server Hyper-V Windows Server Hyper-V on Windows 10
If you are using the latest Windows 10, version 1903, you should have Hyper-V pre-installed.
Enabling Virtualization
Before we start, you need to make sure your machine supports virtualization. Almost all the latest AMD and Intel CPUs support virtualization. The below requirement is needed to get started with Hyper-V
A 64-bit CPU with SLAT support. SLAT stands for Second Level Address Translation Support for virtualization in the form of VM Monitor Mode Extension. It is VT-c on intel chips and SVM mode on AMD Ryzen chips Lastly, you need a minimum of 4 GB of RAM
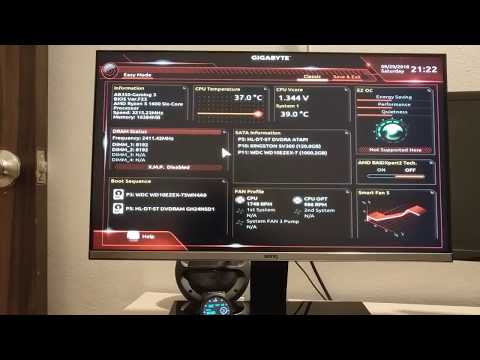
But Hyper-V might fail to start because of disabled virtualization in BIOS. To enable the virtualization of your setup, you need to change it from the motherboard bios itself. I am running AMD Ryzen 1600 with Gigabyte AB350. For this, I needed to go to the bios setting, and then to CPU advanced features and from there change SVM mode from “disabled” to “enabled.” In my case, it worked as intended. But you might also need to enable Hardware Enforced Data Execution Prevention in BIOS. The below video helped me to figure out how to enable virtualization on my setup.
You can also look out for videos on how to enable virtualization. Otherwise, I recommend going through the motherboard manual. To verify if your machine meets the Hyper-V requirements, you need to run systeminfo.exe in the command prompt. To do so, follow the steps below:
Open Start Find Command Prompt Type the command – systeminfo.exe Press Enter
You will get a lot of information output. There you need to check out the Hyper-V requirements. If everything is enabled correctly, it will say Yes on four fields, as shown in the image below.
All Yes? Let’s move on…
Enabling Hyper-V
Now that we have enabled virtualization from BIOS, it is now time to enable Hyper-V. By default, it is disabled. To enable it, follow the steps as below:
Go to Control Panel There search for Programs and click on it Click Turn Windows features on or off
Scroll down and select Hyper-V and also the other two options: Hyper-V Management Tools and Hyper-V Platform.
Click on OK to finalize the process.
It will ask you to restart the system. As most of the time – nothing works on Windows without restarting. Please restart.
Creating a Virtual Switch
Once, above all, is done, it is now time to create a virtual machine. To get started, we need to create a virtual switch. To do so, check the following steps.
Turn on Hyper-V Manager from the start menu Now right-click on your system name and then click on the “Virtual Switch Manager.”
Click on the “New Virtual Network Switch” on the left section and then “External” in the right section.
Finally, click on “Create Virtual Switch.”
You will now be asked to enter a name for the switch. You can put anything for your reference. Under the name section, there will be a section called “connection.” There you need to select the external network connection that you have.
Click Apply and then OK.
Installing Ubuntu
And, finally! There are two ways to install. The easiest way is to take the help of the inbuilt wizard named “Quick Create.” It is listed under the Action menu. Another option is to manually create the virtual machine through a step by step process. Let’s explore both options. But, before that – download the Ubuntu from their official site.
Installing Manually
Click Action → New → Virtual Machine. A new wizard will pop up that will tell you before you begin page – click Next.
Specify the name of your virtual machine along with the location where you want to store it. By default, it stores in your C:\ drive or the drive where your Windows 10 is currently installed. Let’s name our virtual machine as “Ubuntu 19.04″ Next, you need to choose the virtual machine generation. There are two options, including Generation 1 and Generation 2. Select Generation 2 only if you have UEFI-based firmware. This is an important step as you cannot change the type of virtual machine you are trying to install.
Select the memory you want to allocate. I recommend using 2 GB of memory. If you are low on memory, even 1 GB of memory is enough. Also, ensure you turn on dynamic memory for the virtual machine. In the configure networking section, select the network interface you created earlier. Connect to a virtual hard disk. In layman terms, it means that you need to select the location where your virtual hard disk will be stored. Here, you also need to set the size of the virtual machine. For Ubuntu or majority of the Linux OS distros, 25 GB is minimum.
Choose the “Install an operating system from a bootable CD/DVD-Rom.” Then click on “Image File” and select the image file that you downloaded earlier. Click on Next You will now see the final summary of your choices. Review them and click on “Finish.”
Right-click on your new virtual machine and then click “Connect.”
This will start the virtual machine. Follow the screen instruction to complete the installation.
Installing using the Quick Create option
Let’s first see the steps required while using the Quick Create option.
Click on “Quick Create” A new window will pop up where you will be asked to select the operating system. It lets you choose from four operating systems, including MSIX Packaging Tool Environment, Ubuntu 18.04.3 LTS, Ubuntu 19.04, and Windows 10 dev environment. You can select Ubuntu 18.04.3 LTS or Ubuntu 19.04 and click on “Create Virtual Machine.”
It will then download the image of the Ubuntu version you selected. A download may take some time, depending upon Internet speed. Once done, follow on-screen wizard instruction, and you are ready to use Ubuntu. Conclusion I hope this gives you an idea about installing Ubuntu on Windows.